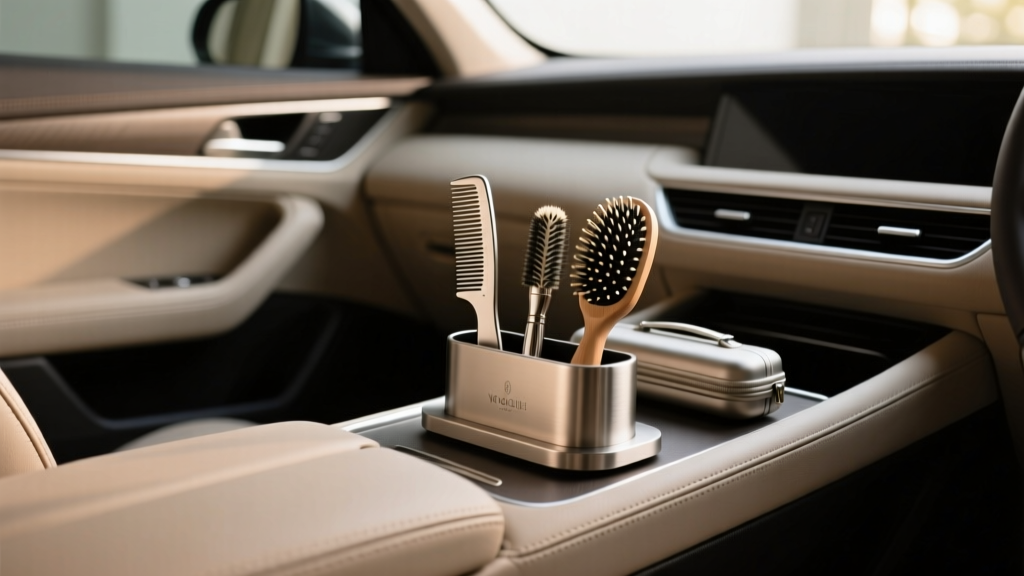
Comb and Brush Holder Installation (2026)
A tidy cabin isn?t just about looks?it?s about making your car easier to live with every day. If you keep a comb, hairbrush, beard brush, or even a small detangling brush in the vehicle, you?ve probably dealt with it sliding under seats, getting dusty in the console, or snagging on other items. A dedicated comb and brush holder solves that in a simple, inexpensive way.
Beyond convenience, proper storage helps keep grooming tools clean and prevents them from becoming projectiles during sudden braking. It also reduces clutter in the door pockets and center console?two spots that tend to turn into ?everything drawers.? Installing a holder takes minutes, but choosing the right style and placing it correctly makes all the difference in daily usability.
This guide walks you through the most common holder types, where to mount them, and exactly how to install them so they stay put through heat, cold, and real-world driving. If you?re aiming for a cleaner, more organized car interior, this is a quick win.
What Is a Comb and Brush Holder (and Why Add One to Your Car)?
A comb and brush holder is a small organizer designed to securely store grooming tools. In vehicles, these holders typically mount to a surface (like the side of the center console) or clip into a visor or seatback pocket. The best ones prevent rattling and keep items accessible without taking up premium storage space.
Benefits you?ll notice right away
- Less clutter: Frees up console and door pocket space.
- Cleaner tools: Reduces exposure to crumbs, dust, and spills.
- Faster access: Handy for quick touch-ups before work or events.
- Improved safety: Fewer loose items that can fly around during hard stops.
- Better cabin aesthetics: Especially if you choose a holder that matches your interior trim.
Choose the Right Holder Style for Your Interior
There isn?t one ?best? comb and brush holder for every vehicle. The right choice depends on your interior materials (leather, vinyl, textured plastics), your climate, and how you want it to look.
1) Adhesive-mounted holders (most common)
These use automotive-grade tape (often 3M VHB) or strong adhesive pads. They?re popular because they install fast and don?t require tools.
- Best for: Smooth plastics, sealed trim surfaces, and flat areas.
- Pros: Clean look, minimal effort, usually very secure when installed correctly.
- Cons: Not ideal on heavily textured surfaces; removal can leave residue.
2) Clip-on holders (visor, seatback, pocket clip)
These holders attach via a spring clip or a rigid hook. They work well if you don?t want adhesive on your trim.
- Best for: Sun visors, seatback pockets, thicker fabric edges.
- Pros: No glue, easy to move between vehicles.
- Cons: Can rattle; may not fit thick visors; can scuff soft-touch surfaces.
3) Console/door-pocket organizers (drop-in style)
These are small trays or divider inserts that sit inside an existing storage space. They?re less about mounting and more about organizing.
- Best for: Drivers who prefer hidden storage.
- Pros: No installation; keeps tools out of sight.
- Cons: Comb/brush may still collect lint; takes up storage volume.
4) Headrest-mounted or seatback strap organizers
More common for families or ride-share drivers?great if passengers frequently need items within reach.
- Best for: Back seat accessibility, vans/SUVs, shared vehicles.
- Pros: High capacity; often includes extra pockets.
- Cons: Bulkier look; may interfere with seat adjustments.
Where to Install a Comb and Brush Holder (Best Locations)
Placement matters as much as the holder itself. You want something reachable but not in the way of driving controls or airbags.
Top mounting spots
- Side of center console (driver or passenger side): Discreet, easy access.
- Inside glove box door or side wall: Keeps items clean and hidden.
- Inside center console lid or side panel: Great for a tidy, OEM-like feel.
- Behind the infotainment area (only if flat and safe): Works in some cars, but avoid blocking vents or controls.
- Seatback pocket area: Better for passengers or ride-share setups.
Places to avoid (for safety and longevity)
- Airbag zones: Steering wheel, A-pillars, side-curtain areas, and many dash panels.
- Direct sun-baked dash tops: Heat can weaken adhesives over time.
- Near shifter movement: Prevents snagging and accidental contact.
- Over soft-touch rubberized coatings: Adhesive can damage the finish when removed.
- On heavily textured plastic: Tape may not get full contact and can fail in hot weather.
Tools and Materials You?ll Want Ready
Most installations are simple, but preparation is what makes it last through summer heat and winter cold.
- Comb/brush holder kit (adhesive, clip-on, or organizer)
- Isopropyl alcohol (70% or higher) or automotive interior prep wipes
- Clean microfiber cloth
- Masking tape (for marking alignment)
- Optional: Plastic trim tool (for routing straps or tucking edges)
- Optional: Adhesion promoter (helpful for challenging plastics)
Step-by-Step: Adhesive-Mounted Comb and Brush Holder Installation
This is the most common and cleanest-looking option. The keys are surface prep, correct alignment, and giving the adhesive time to cure.
Step 1: Test-fit your holder and check clearances
- Sit in the driver?s seat and simulate reaching for the holder.
- Confirm it won?t interfere with seat adjustment levers, knee space, or console lids.
- Insert your comb/brush into the holder to confirm the fit and removal angle.
Real-world tip: If you drive a manual transmission, avoid placing the holder where your elbow or forearm naturally moves while shifting.
Step 2: Clean and prep the mounting area
- Wipe the area with a dry microfiber to remove dust.
- Apply isopropyl alcohol to a clean cloth and thoroughly clean the surface.
- Let it air-dry completely (usually 1?2 minutes).
Why this matters: Interior dressings and cleaners leave residues that can cause tape to fail?especially in hot weather.
Step 3: Mark the position for straight alignment
- Use masking tape to create a small guide line or corner reference.
- Double-check the holder?s orientation (especially if it has a top/bottom).
Step 4: Warm the adhesive (optional but helpful)
- If your cabin is cold, run the heat for a few minutes or park in a warmer spot.
- Adhesive tapes bond best around room temperature or warmer.
Step 5: Apply the holder with firm, even pressure
- Peel the backing from the adhesive pad.
- Carefully align the holder with your tape guides.
- Press firmly for 30?60 seconds, applying pressure across the entire pad area.
Step 6: Let the adhesive cure before loading it up
- Minimum: Wait 1 hour before inserting heavier brushes.
- Ideal: 24 hours for full bond strength (especially with VHB tape).
Real-world example: If you install a holder in the afternoon and immediately hang a full-size paddle brush, it may hold initially but peel overnight when the cabin cools. Waiting the full cure time prevents that ?works today, fails tomorrow? problem.
Step-by-Step: Clip-On Comb and Brush Holder Installation
Clip-on designs are great for leased vehicles or drivers who like to reposition accessories.
Step 1: Choose a stable clip location
- Sun visor edge (verify it still folds properly)
- Seatback pocket lip
- Thicker fabric seam near the console (if available)
Step 2: Protect delicate surfaces
- If the clip contacts soft-touch plastic or leather, add a thin felt pad or clear protective film.
- Make sure the padding doesn?t create looseness that causes rattles.
Step 3: Attach and test for movement
- Clip the holder on firmly.
- Open/close the visor or adjust the seat to verify it doesn?t bind.
- Drive on a rougher road and listen for rattling.
Tip for quieter results: A tiny strip of cloth tape on the clip contact point can eliminate vibration noises without making it permanent.
Product Recommendations and What to Look For
You?ll find countless options online, but quality varies. Rather than chasing a specific brand name, shop by features and materials that hold up in real car conditions.
Features worth paying for
- Automotive-grade adhesive: Look for 3M VHB or equivalent.
- Heat resistance: Especially if you park outside in summer.
- Adjustable slots: Works with a comb plus a brush (or beard brush).
- Rounded edges: Less chance of snagging clothing or scratching skin.
- Washable or wipeable material: Silicone and smooth ABS plastic clean easily.
Quick comparison: which type suits you?
- Want a clean, ?built-in? look? Choose an adhesive-mounted ABS or silicone holder.
- Need portability or have a lease? Choose a clip-on holder or a drop-in organizer.
- Carry multiple grooming items? Choose a small seatback organizer with divided pockets.
- Live in extreme heat? Choose VHB tape + a flat mounting surface; avoid cheap foam tapes.
Common Mistakes to Avoid
- Skipping surface prep: Silicone-based interior protectants are adhesive killers. Clean with isopropyl alcohol first.
- Mounting on textured plastic: Less contact area means weaker bonding and more failures.
- Installing in an airbag deployment area: This is a safety issue, not just a convenience issue.
- Overloading the holder too soon: Tape needs curing time for long-term strength.
- Placing it where knees or elbows hit it: If it irritates you on day one, you?ll hate it by week two.
- Using household glue or generic double-sided tape: Many aren?t designed for temperature swings inside a vehicle.
Practical Tips for a More OEM-Like Finish
- Match colors: Black holders disappear on most trim; tan/gray options can look more factory in light interiors.
- Hide it when possible: Mount inside the center console or glove box if you want a cleaner dashboard look.
- Keep a small cleaning wipe nearby: A quick wipe keeps the holder from collecting product residue (hair spray, beard oil, etc.).
- Use a travel brush: Compact brushes fit better, look tidier, and stress the mount less.
FAQ: Comb and Brush Holder Installation
Can I install a comb and brush holder on leather or vinyl?
You can, but it?s not always ideal. Adhesive can discolor or pull at softer surfaces when removed. If you must mount there, use a clip-on option or apply a removable protective film first and mount to the film.
What?s the best adhesive for car interior accessories?
Automotive-grade acrylic foam tape (commonly 3M VHB) is the go-to for durability and heat resistance. Avoid thin, bargain double-sided tapes that soften in summer.
How do I remove an adhesive-mounted holder without damaging trim?
Gently warm the area (a hair dryer on low works), then use dental floss or fishing line to ?saw? behind the mount. Remove residue with an adhesive remover that?s safe for interior plastics, and finish with a mild interior cleaner.
Why does my holder keep falling off after a few days?
The usual causes are surface dressing residue, mounting on textured plastic, or loading the holder before the tape cures. Clean with isopropyl alcohol, remount on a flatter surface, and give it a full 24 hours before heavy use.
Is it safe to keep grooming tools in the car long-term?
Yes, with a couple of caveats: extreme heat can warp some plastic combs and soften product residue on brushes. If you live in a hot climate, consider a heat-resistant brush and store it out of direct sunlight (console or glove box).
Where?s the best place if I?m sharing the car with family?
A seatback-mounted organizer or a rear console-side holder works well so passengers can access it without the driver reaching across the cabin.
Next Steps: Make Your Holder Installation Last
If you want the holder to stay solid for the long haul, focus on three things: pick a stable location, prep the surface like you?re installing a premium accessory, and let the adhesive cure before you load it up. Once it?s in, do a quick ?weekly check? when you clean your interior?if you notice edge lift or rattles, fix it early before it becomes a mess.
When you?re ready, take the same approach to other small upgrades that make a big difference?seatback organizers, console trays, trash bins, and cable management can transform daily comfort. Keep exploring more practical car interior guides and install tips on carinteriormix.com.